Wednesday, 8 October 2014

Glass drawing with pastels


In this session on the 8/10/14, I had to draw glass bottles arranged on a plinth.  The materials I used were black charcoal, whitle chalk, and light gree, dark green and yellow pastels.  Manila paper and a 4B pencil.  The techniques I used were shading, shape and form,colour, texture, tone,  composition, proportion, perspective, ellipse, scale and smudging.  I really enjoyed using charcoals and pastels in this session adm was quite pleased with the tone and shading of my work.  The area I feel I could improve on is the ellipse technique.  To extend my skills I will research different ways of using pastels and practice drawing ellipse.  


Research 


I chose the above two pictures as I liked how they were just glass object.  I like how well they have managed to give the impression of shinny, streak free, smooth glass.  I especially like how the top picture shows different shaped glass objects.


I liked this drawing as the artists has been a little less subtle with the highlights in the glass and just adding little shimmers of white to show the shine.  


I chose this drawing as I like how it gives the impression of movement.  I think the artist has done a brilliant job making the water look clear but visible by using charcoal and white pastel for different tones, highlights and shading.  I would like to use this style and technique in my work in the future.  


I think this drawing is amazing.  I love how the artist has used white pastel on the bottom of the polar bear to give the impression that the light has gone thought the glass and it hitting the surface it's stood on.  I also love how different shades and tones have been used to show all the different angles and that the polar bear has a textured glass surface.  The blackness of the nose and eyes are bold and stand out and also show a more smooth texture compared to the body.  I think that the style and technique the artists has used here is something I will definitely remember for future drawings.  


Tuesday, 7 October 2014

Negative spaces


In this session on 1/10/14 I had to draw the negative spaces in an arrangement of objects.  The materials I used for this were a 4b pencil and and A1 piece of paper.  To do this I had to draw the shapes of the negative spaces making sure I got the perspective and proportions right.  After I'd drawn all the negative spaces, I used a dark tone to shade in the negative spaces which made the positive spaces on my drawing stand out and began to show the shapes of the object in the arrangement.  I really enjoyed doing this technique and found it quite easy to do. The areas of my work I could improve are to try and work a bit faster to try and complete my picture.  To extend my skills I am going research other negative space drawings. 


Research

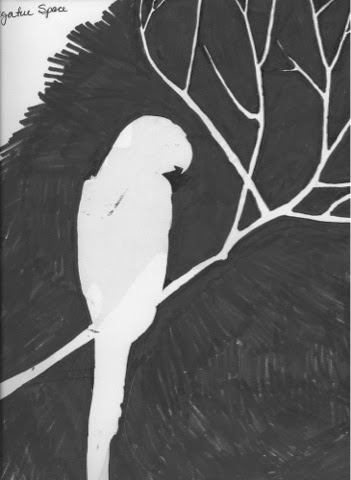
From the research shown below I have discovered new techniques and ideas for negative space drawing.  I really like the different objects and items other people have used such as the bike and the bird in the tree.  I also really like how some artists have drawn patterns and even used a selection of colours to show the negative spaces making the positive spaces stand out more.  


Boxes

In this session on 24/9/14 I had to draw boxes placed on each other.  To do this I had to use proportion, one and two point perspective, and parallel lines. I used my pencil at arms length to measure the length of the boxes to draw them to scale on my paper.  I then had to shade in the boxes to add tone and form.  I found this session quite difficult as It took me quite a while and quite a few attempts to get the proportion and perspective right.  After getting it right I liked my outcome and think this technique will be very useful for future drawings.  


Research
The research shown below is from an art book I own. After reading through this I think I have a far better understanding of one and two point perspective and I think that this will help me get the correct proportions within my future drawings.